Indoor gardening is booming, and it’s easy to see why. People want green spaces, even in tight city apartments. But growing plants without a yard? That’s a real challenge.
Limited space, poor sunlight, and no soil access make it tricky for urban dwellers. That’s where hydroponics comes in. It lets you grow plants without dirt—just water, nutrients, and a little know-how.
Going soilless means cleaner gardening, faster growth, and fewer critters. It also saves water and doesn’t leave your floor covered in spilled soil.
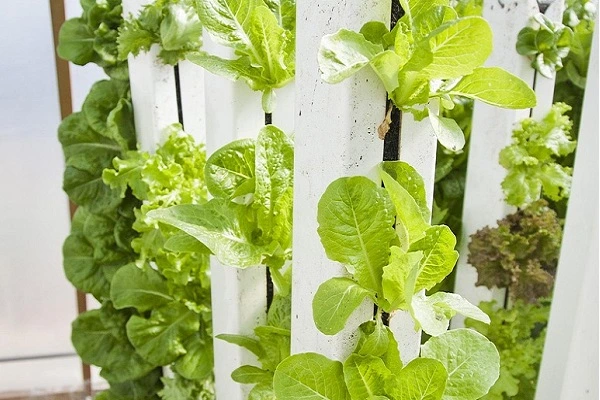
Now, imagine going vertical. Stack your garden up, not out. A vertical system made with PVC pipes is perfect for small homes. It’s compact, cheap, and easy to build. You can fit one on a balcony, near a sunny window, or under grow lights.
In this guide, you’ll learn how to create a vertical soilless system using PVC pipes. It’s beginner-friendly and surprisingly fun to set up. Let’s turn that small space into a thriving, edible wall.
What is a Soilless (Hydroponic) Growing System?
Hydroponics is a way to grow plants without soil. Roots sit in water filled with nutrients instead. No digging, no messy dirt, just clean, efficient growing.
Traditional gardening uses soil. Hydroponics skips that and feeds plants directly. Without soil, roots get exactly what they need—nothing more, nothing less.
Plants often grow faster in hydroponic systems than in dirt. They also use less water, which is great if you’re trying to conserve. Fewer bugs and weeds mean less maintenance and no harsh chemicals.
Hydroponics works indoors, so you’re not stuck waiting for the right time of year. Vertical systems make it even better. They grow up, not out. You can fit a tall garden into a corner or next to a window.
That means more plants in less space—perfect for apartment living. Stacked systems also look sleek and modern, adding a green touch to your home.
If space is limited, vertical hydroponics is your best bet.
Why Choose a PVC Pipe System for Small Apartments?
PVC pipes are cheap, easy to find, and simple to work with—even if you’re new to DIY projects. They’re light, so you don’t need heavy tools or a big setup.
You can cut and shape them to fit any nook or corner in your apartment. Small balcony? No problem. A narrow window? Still works.
You can even place the system under grow lights if sunlight’s an issue. PVC systems don’t take up much floor space, which is perfect for tight living areas. They’re also easy to move around if you want to change things up.
Most PVC parts are reusable, so you can tweak your setup anytime. Using PVC means less waste and more flexibility in your garden design. It’s a smart way to build a vertical system that fits your space and budget.
What You’ll Need to Build Your System
Here’s a simple list of what you’ll need to get started, plus why each one matters:
- PVC Pipes – Main structure of your system. Go with 3–4 inch pipes for enough room for roots. Length depends on your space.
- End Caps and Elbows – These close off pipe ends and help direct water flow. Keep leaks and spills under control.
- Net Cups or Small Planters – Hold your plants in place inside the holes you’ll drill in the PVC. They keep roots suspended in the water.
- Drill with Hole Saw Bit – Used to make holes in the pipe for your net cups. A hole saw bit makes this job much easier and cleaner.
- Submersible Pump – Moves water from the reservoir up through the system. Helps keep water and nutrients flowing.
- Water Reservoir (Bucket or Bin) – Holds your water and nutrient mix. Place it at the base of your system.
- Tubing for Water Circulation – Connects your pump to the top of your pipes. It carries water through the loop.
- Grow Medium – Use clay pebbles, coco coir, or rockwool. These support your plants and hold moisture without soil.
- Nutrient Solution – Liquid food for your plants. It replaces the nutrients they’d normally get from soil.
- Optional: Timer – Automates your pump. Set it to run at intervals so your roots don’t dry out or drown.
- Optional: pH Meter – Checks the acidity of your water. Keeping pH in check helps plants absorb nutrients.
- Optional: LED Grow Lights – Helpful if you don’t have natural sunlight. Choose full-spectrum lights for indoor setups.
Step-by-Step Guide
Ready to build your DIY system? Follow these steps to get your vertical garden growing in no time.
Step 1: Plan Your System
Start by picking the spot for your system. Look for light—natural or artificial.
Measure your available height and floor space. Even a narrow corner can work.
Think vertical. A 4–6 foot setup is ideal for most small apartments.
Choose what you want to grow. Start with herbs or leafy greens—they’re easier.
Lettuce, basil, kale, mint, and spinach are beginner-friendly and grow fast.
Make sure your chosen plants fit the pipe size and spacing you’ll build.
Also, think about drainage. Water should return to the reservoir easily.
Sketch a simple layout so you know how everything will fit.
Step 2: Cut and Drill the PVC
Use 3–4 inch diameter PVC pipes. Cut them to the height that fits your space.
Each pipe can hold several plants—plan 6–8 inch spacing between holes.
Use a marker to mark hole spots in a staggered pattern for better airflow.
Drill with a hole saw bit slightly smaller than your net pots—usually 2 inches.
Smooth out the edges with sandpaper so they don’t cut the roots or cups.
You can also drill a small drainage hole at the base of each pipe if needed.
Step 3: Assemble the Frame
Support your pipes with a stable base. A wooden box or metal rack works well.
For a wall-mounted system, use pipe clamps or brackets to secure it safely.
Free-standing? Add elbows or tees at the bottom to help it stand upright.
Make sure it’s solid—water weight adds pressure to the system.
Check that there’s room underneath to place your water reservoir.
Leave access space so you can refill the tank and service the pump.
Step 4: Set Up the Water Circulation
Place your reservoir (a clean bucket or plastic bin) beneath the pipes.
Install a small submersible pump inside the tank. This will move water upward.
Connect tubing from the pump to the top of each pipe or the top row.
You can create a simple drip system or a closed-loop NFT-style setup.
Use elbows or caps to direct excess water back into the reservoir.
Test the flow. You want steady water circulation, not too fast or slow.
Add a timer to run the pump every 15–30 minutes, depending on your setup.
Step 5: Insert Net Pots and Add Medium
Fill each net cup with a growing medium—try clay pebbles, coco coir, or rockwool.
Don’t pack it too tightly—roots need space to breathe and absorb water.
Place seedlings gently into the medium. Make sure the roots reach through.
Drop each net cup into its drilled hole. It should sit snugly without falling in.
If you’re starting from seed, keep the system damp and warm until they sprout.
Label your plants if you’re growing a mix—it’s easy to forget what’s what!
Step 6: Add Nutrients and Test the System
Fill the reservoir with clean water. Then mix in a hydroponic nutrient solution.
Follow the bottle instructions—too much can burn roots, too little stunts growth.
Use a pH meter to check your solution. Ideal pH is between 5.5 and 6.5.
Adjust using pH up/down solutions, which you can find at garden stores.
Turn on the pump and let the water circulate. Check that each plant gets moisture.
Watch for leaks, overflows, or dry spots in the system and adjust as needed.
Let it run for a full cycle. Make sure everything’s working before walking away.
Best Plants for Beginners to Grow in Your Vertical System
Start with plants that grow fast and don’t ask for much. Easy wins keep things fun and stress-free.
Lettuce
Grows quickly and doesn’t need tons of light. Perfect for salads in just a few weeks.
Spinach
Another low-maintenance green. It does well in cooler temps and partial light.
Basil
Loves warmth and light. Great for windowsills. Snip leaves often to keep it growing strong.
Mint
Hardy and fast-growing. Just don’t plant too much—it spreads like crazy, even in water.
Arugula
Adds a peppery bite to dishes. Grows fast and handles different light levels well.
Strawberries
They take more time but are fun to grow. They need bright light and regular feeding.
Maintenance Tips for Long-Term Success
A little routine care keeps your system running smooth and your plants happy.
Check Water and Nutrients
Look at the water level every few days. Top it off when it gets low.
Add nutrients based on the plant’s stage—seedling, growth, or bloom.
Watch for signs like yellow leaves. That can mean a nutrient imbalance.
Clean the System
Rinse your pipes and reservoir every few weeks to prevent buildup.
Flush the tubing with clean water to avoid clogs or algae slime.
Use a mild vinegar solution if things start to smell or feel slimy.
Monitor Plant Health
Healthy plants have strong color and steady growth. Check leaves often.
Brown spots, limp stems, or drooping leaves mean something’s off.
Trim dead leaves and watch root growth through the net pots if possible.
Troubleshoot Common Issues
If you see green slime inside the pipes, that’s algae. Reduce light exposure.
Pump not working? Check for clogs in the tubing or debris in the reservoir.
If roots turn brown or mushy, it could be root rot. Improve water flow and air.
Advantages of Building Your Own Vertical PVC Hydroponic System
Personalized Design
You can make it fit your space. Adjust the height, width, and shape. It’s your garden, your way.
Budget-Friendly
PVC pipes are cheap. You can find most materials at your local hardware store. No need to buy expensive pre-made systems.
Sense of Accomplishment
Building it yourself feels amazing. You’ll have pride in growing your own food, especially in a small space.
Constant Supply of Greens
Grow fresh herbs or veggies all the time. You control the environment, so you can have produce even when it’s not in season.
Wrapping Up
Building your own vertical hydroponic garden is rewarding and fun. It saves space and gives you control over your plants. You’ll enjoy fresh herbs, greens, or even strawberries, all in a small area. Plus, it’s a budget-friendly way to garden indoors.
Start small. Even a simple setup can bring great results. As you get the hang of it, you can expand your system and grow more. Take it one step at a time. Soon, you’ll have a thriving, self-sustaining garden in your apartment. Happy growing!