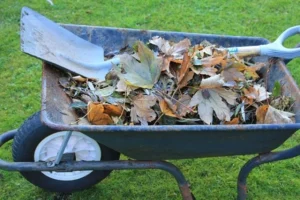
Ever looked at a banana peel or a handful of coffee grounds and thought, “Could this help my salad grow?”
If you’re gardening in a tiny space, especially indoors, the answer is yes—surprisingly often.
Tiny home growers already work magic with limited light, airflow, and space. But nutrients? That’s the secret sauce. Store-bought solutions can be pricey, synthetic, or wasteful. So why not make your own?
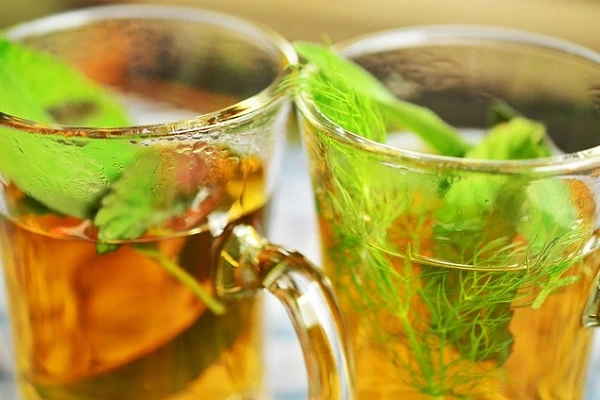
Scrap-based “leaf tea” isn’t just a cute name. It’s a method of turning kitchen cast-offs into gentle, plant-friendly nourishment. And it fits beautifully into your compact routine.
You don’t need fancy gear or a backyard compost bin. All you need is a few food scraps, water, and a little patience. Think of it like a homemade energy drink for your greens—simple, clean, and low-cost.
In this guide, we’ll walk through how to make it, what to use, and how to feed your indoor crops without stinking up the place or stressing out your roots.
Let’s turn your kitchen trash into garden treasure—one cup of leaf tea at a time.
What Is Scrap-Based Leaf Tea and Why It Works
Scrap-based leaf tea sounds fancy, but it’s really just kitchen wisdom with a modern twist. It’s made by soaking plant-friendly food scraps in water to extract nutrients your indoor crops can actually use.
Think of it like making a compost tea—only without the mess, smell, or backyard. Perfect for small indoor setups where space and air circulation are precious.
When you brew this tea, you’re releasing minerals and trace elements from peels, skins, and other leftovers. Things like calcium, potassium, and nitrogen—all vital for healthy plant growth—leach out into the water.
The result? A gentle, liquid booster that’s far less aggressive than commercial feeds. That matters in small-scale gardening, where your system—and your plants—can be more sensitive.
It’s especially useful in closed, soilless environments where nutrients don’t naturally replenish. This tea fills the gap in a way that’s easy to control and totally DIY-friendly.
Plus, it’s a win-win: fewer food scraps in the trash, more vitality in your home-grown greens.
We’ll get to the “how” in a moment, but first let’s talk ingredients—because not all scraps are created equal.
Ingredients Guide – What to Use and What to Avoid
Not all kitchen scraps are created equal when it comes to feeding your plants. Some ingredients pack a punch, while others might end up doing more harm than good. Let’s break it down into a simple guide.
What to Use
- Banana Peels: Rich in potassium, they help with flowering and fruiting. They’re also full of other micronutrients your plants will love.
- Coffee Grounds: High in nitrogen, coffee grounds boost plant growth, especially leafy greens. They also improve soil texture if you’re using compost.
- Eggshells: Crushed eggshells provide calcium, which is essential for strong cell walls and healthy root systems.
- Onion Skins: Packed with trace minerals like sulfur and iron, onion skins help keep your plants healthy and resistant to disease.
- Green Tea Bags: If you drink tea, save the bags! They’re rich in micronutrients and are a great way to supplement the tea with a gentle boost.
What to Avoid
- Citrus Peels: While they may smell nice, citrus fruits are too acidic for most plants and can throw off your system’s balance.
- Meat or Dairy: These can attract critters and lead to unpleasant odors. Keep it plant-based!
- Oily Scraps: Leftovers with oils or fats can create a slimy buildup in your containers and attract bacteria.
- Processed Foods: Skip scraps from processed snacks—like chips or packaged meals—which can be salty and full of preservatives.
By sticking to the safe scraps, you can create a nutrient-rich tea that’s easy on your plants and your system.
Brewing and Storing in Tiny Homes Without the Mess
Brewing your own nutrient-rich leaf tea doesn’t need to be complicated or smelly. With a little setup and a few tips, you can make your own brew right in the comfort of your tiny home.
How to Brew It
Start with a clean jar or container, preferably something that holds 1-2 liters of water. Add your scraps—about a handful or two, depending on the strength you want. If you’re using banana peels or coffee grounds, chop them up a bit to help release nutrients faster.
Fill the jar with water, then cover it loosely with a lid or cloth. You want air circulation but no full exposure, to avoid attracting unwanted critters. Let your tea steep for 24 to 48 hours, stirring occasionally if you like.
As the tea brews, the nutrients from the scraps dissolve into the water, creating a mild but effective liquid fertilizer. It’s a good idea to check the brew daily—if it starts to smell sour, it might be over-fermenting. Just give it a gentle shake and check the color—it should look a little murky but not too dark.
Storing It in Small Spaces
Once your tea is brewed, strain out the scraps using a fine mesh or cloth. Transfer the liquid into a clean bottle or jar for easy use. Store it in the fridge to keep it fresh, and use it within a week. If you’re brewing in bulk, make sure to store it in smaller, labeled jars for convenience.
This method works well for tiny homes or apartments because the setup is small, quick, and non-intrusive. Plus, it doesn’t require a lot of space, and you can stash it out of the way on a countertop or shelf.
Feeding Small-Space Crops Without Overdoing It
Now that your scrap-based leaf tea is ready to go, it’s time to put it to work on your tiny home crops. But remember, a little goes a long way! Overfeeding your plants can cause harm, especially in small hydroponic setups.
How Much to Use
For most small-space crops, you’ll want to dilute the tea before applying it. Think of it like giving your plants a drink, not a buffet. A good rule of thumb is to mix one part tea with three parts water. This ensures the nutrients are gentle and easy for the plants to absorb.
If you’re just starting out, try using the tea once a week. For more mature plants, you can increase the frequency to every 3-4 days, but still keep the concentration light. It’s always better to err on the side of caution than overfeed.
Best Time to Feed
The best time to water your plants with the tea is in the morning, when the plants are ready to take in nutrients. You can do it during your regular watering schedule, which helps maintain consistency. Don’t forget to water the roots thoroughly, so the nutrients reach deep into the soil or hydroponic medium.
Avoid using the tea during the hottest part of the day or when plants are stressed. If your system is getting too much sunlight, this can cause the plants to absorb nutrients too quickly, leading to potential burns or growth issues.
Avoiding Overfeeding
Signs of overfeeding include yellowing leaves, burnt tips, or wilting. If you notice these signs, it’s time to flush the system with plain water to remove excess nutrients. Always check on your plants regularly—small-space crops are particularly sensitive to nutrient imbalances.
Monitoring Plant Response in Compact Environments
Even the best homemade plant tea won’t help if your greens don’t like it. That’s why it’s so important to keep an eye on how your crops react—especially in small spaces where every leaf counts.
Start Small and Observe
When trying scrap-based tea for the first time, start with just a few plants. This gives you a mini test group to monitor. If they thrive, you know you’re on the right track. If not, you can tweak your brew without affecting your whole setup.
Look for small changes in leaf color, texture, or growth rate. If your leaves look perkier and greener a day or two after feeding, you’re probably doing something right. Sluggish growth or browning? You might need to dilute your tea more or reduce how often you use it.
Use Simple Tracking Tools
You don’t need a fancy app to track plant response. A basic plant journal or even sticky notes can help. Mark when you fed, what you used, and what the plants looked like before and after. This helps you build your own personalized plant playbook over time.
You can even take weekly photos of your crops to see subtle changes you might miss day to day. It’s fun, low-pressure, and incredibly useful—especially in small grow spaces where little improvements make a big difference.
Monitoring plant response is just as important as making the tea. Observation leads to understanding, and that leads to better harvests.
Troubleshooting Common Mistakes with Scrap-Based Teas
If your first batch of leaf tea doesn’t give the results you expected, don’t stress—it’s all part of the learning curve. Mistakes happen, and most are easy to fix once you know what to look for.
It Smells Bad
If your tea smells rotten or sour, it probably steeped too long or wasn’t covered properly. Next time, steep it for just 24 to 48 hours and make sure the container is covered loosely—not sealed tight. This keeps air flowing while keeping bugs and funk out.
Leaves Look Burnt or Curled
This is often a sign the tea was too strong. Try diluting it more—use one part tea to four or even five parts water. In small, soilless systems, plants can be more sensitive, so gentler is usually better.
There’s Mold in the Tea
Mold usually shows up if scraps were too old, contaminated, or stored in warm conditions. Use fresh scraps, clean water, and containers you’ve rinsed well. If you spot mold, toss the batch and start fresh.
Plants Aren’t Responding at All
Not every plant will love every tea. Some crops respond better to nitrogen-heavy blends, while others prefer a potassium boost. Track your results and adjust your ingredients. The more you observe, the more you can personalize each brew.
Too Much Residue in the Water
If your tea leaves behind gunk or clogs your watering tools, strain it better. A fine mesh or even an old t-shirt can work wonders.
Don’t worry if you hit a bump or two—this process is meant to evolve with your experience. It’s more about learning your system than getting it perfect on the first try.
Wrap-Up – Turning Waste into Wins for Your Indoor Garden
Who knew your kitchen scraps could hold so much potential? By brewing your own nutrient tea, you’re not just feeding your crops—you’re creating a low-waste, high-reward cycle that fits perfectly into small-space gardening.
This simple method gives you more control, saves money, and reduces your environmental footprint. It’s a small habit with a big impact, especially in tiny homes where every inch—and every resource—counts.
Remember, you don’t need a green thumb or fancy equipment to make this work. Just a clean jar, a few common scraps, and the willingness to observe and adjust as you go. You’re not just growing food—you’re growing a system that works with your lifestyle.
So the next time you peel a banana or crack an egg, think twice before tossing it. That “trash” might just be your indoor garden’s new favorite snack.