You don’t need a backyard, fancy tools, or even a green thumb to get started with herbs at home. In fact, you probably already have most of what you need—especially if you’ve got a few empty bottles lying around and a sunny windowsill.
Starting with herbs is one of the easiest and most rewarding ways to dip your toes into small-space food production. They grow quickly, smell amazing, and can instantly upgrade anything from your morning eggs to your evening pasta.
This guide is built just for beginners—no confusing setups, no expensive gear, and definitely no pressure. We’ll walk you through the basics of turning simple, recycled bottles into something surprisingly functional.
Let’s kick things off with a project that’s as small as your kitchen shelf but packed with flavor and satisfaction. Ready?
Why Kitchen Herbs Are the Perfect First Step
If you’re just starting out, herbs are a smart choice. They’re low-maintenance, fast to show results, and forgiving if you forget a watering or two. Plus, they’re incredibly useful—what you grow can go straight into your next meal.
Small Space, Big Impact
Unlike larger crops, herbs don’t need much space to thrive. A single bottle on a windowsill can support a healthy sprig of basil or mint. No need for complicated setups or big shelves—this is all about making use of what you already have.
Easy to Care For
Many herbs can thrive with just a bit of sunlight and water. They’re ideal for anyone just learning the basics of light, timing, and care. You won’t need timers, pumps, or special nutrients. The simplicity makes them great for learning by doing.
Fast Gratification
Some herbs begin to show new growth within a week or two. That kind of quick feedback is great for beginners. It’s motivating to see progress so soon, especially when you’re still learning the ropes.
Common Beginner-Friendly Herbs
Here are a few herbs that work especially well in bottle setups:
- Basil – Loves warmth and grows quickly
- Mint – Hardy and aromatic, great for small containers
- Parsley – Easy to start and easy to use
- Chives – Great for cut-and-come-again harvesting
- Cilantro – Fast-growing and flavorful
Starting small with herbs means you can learn as you go—no pressure, just progress. Before long, those bottles on your shelf will be more than a project. They’ll be part of your kitchen routine.
Understanding the Basics: What You’ll Be Doing and Why
Before you get started, let’s take a step back and break down what this project actually involves. Don’t worry—nothing complicated here. Just a few simple materials, a clear goal, and a bit of care.
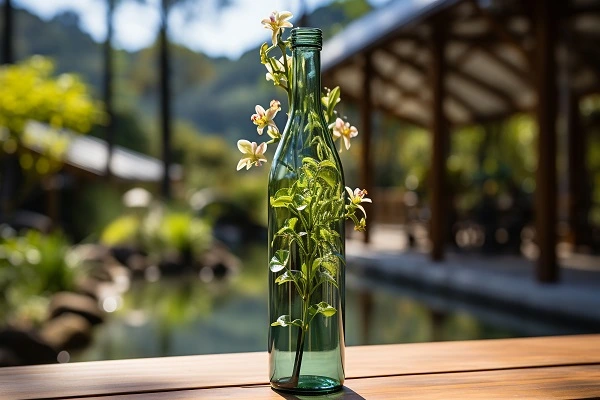
What Are You Building?
You’re creating a self-contained herb setup using an empty bottle, water, and a small starter plant or cutting. Think of it as a low-effort way to explore how food can grow in a container without using soil.
No pumps, no electronics, and no deep science required.
Why Bottles?
Recycled bottles are perfect for first-time setups:
- They’re easy to find and free
- They’re clear, so you can watch what’s happening
- They help you understand how roots and water interact
Plus, using bottles keeps the project budget-friendly and low-waste.
What You’ll Learn
This beginner build will teach you:
- How to keep roots hydrated with minimal effort
- What light and placement mean for healthy growth
- How to observe and respond to your herb’s needs
These are core lessons that apply to almost every other small-space food setup you might try later.
What You’ll Need
You won’t need much to start:
- One or two clean plastic bottles
- A cutting tool (like scissors or a knife)
- Cotton or string (for the wick)
- A small herb seedling or cutting
- Water
- A sunny spot near a window
Once you understand how each piece works, it’ll all make sense—and you’ll feel ready to move from theory to action.
Choosing Your Bottles and Setup Spot at Home
One of the best parts about starting with bottles is that you don’t need anything fancy. The right container might already be sitting in your recycling bin. Let’s walk through how to pick the best bottle and where to put it for the best results.
What Kind of Bottle Works Best?
Not all bottles are created equal. Here’s what to look for:
- Size: A 1- to 2-liter bottle is ideal—big enough for roots, small enough to manage.
- Material: Use clear plastic so you can monitor water and root growth.
- Shape: Go for bottles with straight sides. Curves can make cutting tricky.
Avoid bottles that are heavily tinted or unusually shaped. You want something simple and easy to work with.
Cutting It Right
You’ll likely be cutting the bottle into two parts—top and bottom. The top becomes the holder for your herb, and the bottom becomes the reservoir. Make sure it balances well when assembled. If it wobbles, try trimming or weighting the bottom with a few pebbles.
Picking the Best Spot
Location matters more than you think. Here’s what to consider:
- Light: Choose a sunny windowsill or bright shelf. Morning light is great.
- Accessibility: Pick a place where you’ll see it often, so you remember to check in.
- Drip Safety: Keep it away from electronics or papers in case of a spill.
Start with just one or two bottles. Once you see how easy it is, you can scale up—slowly and confidently.
Step-by-Step: Building Your First Bottle-Based Herb Setup
It’s time to bring your project to life. If this is your first attempt at something like this, don’t stress. The process is easy to follow and very forgiving. Even if you make a few mistakes, you’ll still come away with something that works—and teaches you a lot.
Step 1: Cut the Bottle
Start by slicing the bottle into two parts. The top third will become your herb holder, and the bottom two-thirds will hold the water. Flip the top upside down so it forms a funnel and rests inside the bottom section.
Step 2: Insert the Wick
Thread a cotton wick or cloth strip through the bottle cap. The bottom of the wick should hang into the water chamber, while the upper part stays in the funnel. This draws water upward without effort.
Step 3: Add Your Growing Medium
Scoop in a small amount of moist material like coconut coir or light potting mix. Pack it lightly around the wick. This helps retain moisture and gives the herb roots something to hold onto.
Step 4: Plant the Herb
Place your seedling or cutting into the top section. Make sure it sits securely and the base is in contact with the moist medium. Adjust gently until it feels stable.
Step 5: Fill the Reservoir and Place It
Pour water into the lower bottle section—just enough to reach the wick. Then set the bottle in its chosen spot with good light exposure. That’s it—you’ve built your first bottle-based herb setup.
Light, Water, and Care Without the Fuss
You’ve set up your bottle and planted your herb—now what? The next step is maintenance, but don’t worry. This part doesn’t involve complicated schedules or special tools. A little attention goes a long way.
Keep It in the Light
Herbs love light. That doesn’t mean you need a grow lamp or a fancy setup. A windowsill that gets at least 4–6 hours of sunlight a day will usually do the trick. South-facing spots are ideal, but bright east- or west-facing windows can also work.
Rotate your bottle every few days so the herb doesn’t lean toward the light. This helps it stay balanced and encourages stronger growth.
Watch the Water Level
With a wick setup, the bottle handles most of the watering work for you. Still, you’ll want to keep an eye on the water level in the reservoir. Check every few days. If it’s getting low, top it off.
Try not to let it run dry for long periods, but don’t flood it either. The wick does best when it’s just reaching the water, not submerged completely.
Quick Daily Check-Ins
Take a moment each day to give your herb a quick once-over. Does it look healthy? Is it standing upright? Are the leaves perky? These small signals help you catch issues early.
There’s no need to overthink it. With light, water, and a glance now and then, your herb can thrive with minimal fuss.
Common Missteps Beginners Can Easily Avoid
It’s normal to run into a few hiccups when starting something new. That’s part of the learning process. Most beginner mistakes are easy to spot and even easier to fix once you know what to look for.
Overwatering the Setup
One of the most common issues is adding too much water. Since the wick already delivers moisture steadily, there’s no need to flood the bottom section. If you see water creeping up into the growing medium, it’s probably too full. Pour a little out and give the roots some breathing room.
Too Much Shade
Even though bottle setups are low-maintenance, they still need consistent light. Placing your herb in a dim hallway or far from a window can lead to weak, leggy growth. If your herb seems to be stretching or losing color, try moving it closer to natural light.
Ignoring the Wick
The wick is your silent helper—but it can stop working if it dries out completely or clogs. Check it once a week to make sure it’s moist and still pulling water. If you notice the top section drying out, re-soak the wick or replace it.
Starting With the Wrong Herb
Not all herbs behave the same way. Some are pickier than others. For beginners, it’s best to start with forgiving options like basil, mint, or parsley. Save the trickier ones—like rosemary—for later once you’ve got the basics down.
Remember, mistakes are just part of the process. Each one gives you a better feel for how this all works.
Your First Step Toward Greener Confidence
Getting started is often the hardest part, but now you’ve taken it. By putting together your own bottle-based herb build, you’ve done more than create a growing space—you’ve proved that even small city homes can support fresh ideas and fresh flavors.
This simple setup isn’t just about herbs. It’s about building trust in your ability to work with what you have. Every bottle, every sprout, every leaf is a reminder that resourcefulness goes a long way.
Keep things light, stay curious, and don’t be afraid to experiment. Small steps like this lead to bigger projects down the road. You’re not just growing herbs—you’re growing confidence, one bottle at a time.