Creating a productive indoor grow setup in a small apartment can seem like a challenge, but with careful design and a focus on hydroponic principles, you can create a thriving system that fits seamlessly into your limited space. This article explores how to design an efficient, quiet, and visually pleasing grow setup that respects the unique limitations and possibilities of apartment living.
Understanding Your Spatial Constraints
Before building anything, take time to assess the space available. Are you working with a windowsill, a corner of your living room, or a closet repurposed for gardening? Measure your vertical and horizontal space, and consider how often you’ll need to access the system for maintenance, planting, and harvesting. Ideally, the setup should blend with your daily life rather than disrupt it.
Also think about noise, weight, light exposure, and proximity to water and power sources. A good design accounts for these practical aspects, especially since many apartments have strict limits on modifications or added fixtures. For instance, a heavy reservoir on a lightweight floor or a loud pump near a sleeping area could become an issue.
Ask yourself these practical questions:
- Will this setup block access to other parts of your apartment?
- Is there enough airflow and ventilation in the area?
- Can you easily reach the top and bottom levels of your grow system?
- How much daily time can you realistically dedicate to system care?
- Will you need to disassemble the unit for moving or storage?
Document these answers before starting to design. Even sketching a simple layout on paper can help prevent surprises later.
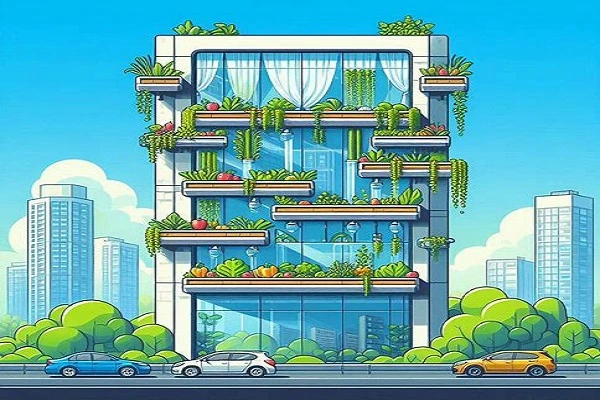
Prioritizing a Vertical Layout
Verticality is key in small-space gardening. Instead of spreading out, think about stacking upward. Use a tiered layout or vertical tower to maximize the number of plants per square foot. Wall-mounted shelves, hanging systems, or corner units can serve as the structural base for your setup.
Choose a location where vertical space is underutilized. Near windows or walls, and even unused nooks between furniture, can offer ideal placement for grow towers or vertical shelves. If you’re not ready to commit to permanent changes, use freestanding shelving or vertical carts that can be easily relocated.
A few popular formats include:
- Vertical hydroponic towers – Efficient, self-contained units that circulate water from a reservoir at the bottom.
- Multi-level shelving with grow lights – Simple to assemble and customize for herbs or leafy greens.
- Hanging plant walls or wall-mounted hydro units – Visually appealing and great for apartments with limited floor space.
- Stacked bucket or tote systems – Budget-friendly and easy to build using repurposed containers.
If you’re short on time, start with a basic unit and expand later. Choose designs that allow for add-ons without a complete overhaul.
Designing for Function and Form
A successful indoor grow setup must be both functional and aesthetically pleasing—especially when it’s in your living space. Consider design choices that blend into your home decor. Sleek containers, tidy wiring, and compact reservoirs go a long way in keeping the system unobtrusive.
Avoid bulky materials or makeshift elements that can make the system look out of place. Concealed piping or minimalist hydroponic containers can help maintain visual harmony. Modular setups with clean lines are easier to expand or modify as your needs evolve.
Use neutral tones or materials that echo existing furniture, like light wood or matte black. If you’re handy, you might even build a custom enclosure for your setup that doubles as a decorative shelf or partition.
To enhance both appearance and usability:
- Hide wiring behind furniture or in cable sleeves.
- Use decorative plant labels or uniform containers.
- Install dimmable grow lights to soften the evening ambiance.
- Integrate shelving with other furniture like bookshelves or media units.
Design for discretion as well. If your system is near common living areas, incorporate curtains, sliding panels, or foldable partitions to hide the setup when not in use.
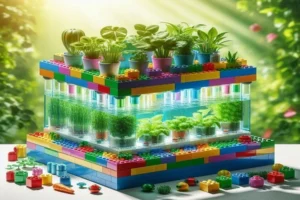
Choosing the Right Components
Select lightweight, durable materials to avoid adding unnecessary bulk. For structural elements, consider using food-safe plastics, lightweight metals, or sturdy recycled containers. Modular shelves or stackable trays provide flexibility in arrangement.
Opt for a quiet, low-wattage water pump and energy-efficient LED grow lights designed for indoor use. Apartment-friendly systems should emit little heat and produce minimal noise to avoid bothering neighbors or interfering with your relaxation. A pump with a timer simplifies maintenance and makes nutrient delivery more consistent.
For the growing medium, go with lightweight options like:
- Rockwool cubes
- Expanded clay pellets (LECA)
- Coconut coir plugs
- Perlite mixes
These options support plant roots while keeping mess to a minimum and are easy to replace or reuse. Avoid soil if possible—it’s heavier, messier, and more prone to attracting pests indoors.
Reservoir size depends on your plant count, but it should be easy to refill and clean. Avoid open containers that might cause splashes or evaporation in indoor conditions. A 5-gallon bucket with a lid and fitted hose ports is often sufficient for a beginner setup.
Look for:
- Submersible, quiet pumps with flow control
- LED grow lights with adjustable spectrums
- Timer units with dual plug capability
- Drip emitters or wicking systems for steady hydration
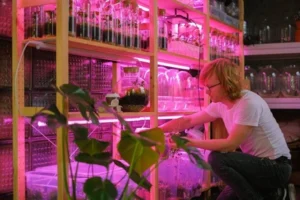
Efficient Use of Light and Air
Natural light can supplement your system, but most setups will need artificial lighting for consistency. Use full-spectrum LED grow lights mounted on adjustable arms or hung vertically to match plant height. Reflective surfaces, like Mylar sheets or even mirrors, can bounce light to lower levels of the system.
Match the lighting intensity to your plants. Leafy greens need moderate light, while fruiting plants like cherry tomatoes or peppers require stronger, longer exposure.
Ensure proper air circulation to avoid mold or stale air. Small clip-on fans or passive ventilation slots near windows can improve air quality around your plants. Consider installing a small carbon filter if you’re concerned about odor from nutrient-rich water.
Use a simple timer for lights and fans to automate their operation. This keeps the environment consistent and reduces manual effort.
Planning Maintenance into the Design
Your design should make routine care simple. Water refills, nutrient adjustments, and plant trimming should be accessible without having to move the entire structure. Include quick-connect tubing, removable trays, and easy-access reservoirs to streamline upkeep.
Build in overflow protection in case of spills or leaks. Use waterproof mats beneath the structure and keep electronics elevated or shielded from potential water contact. Consider plastic catch trays under each level to contain drips.
Label components for quick troubleshooting—tubes, connections, power timers. This level of organization pays off when you’re adjusting cycles or cleaning the system.
To reduce your daily tasks, plan a low-maintenance nutrient schedule. Mix larger batches of nutrient solution and keep a log of what’s added and when. This helps maintain stability and avoids over- or underfeeding.
Maintenance Quick Checklist:
- Check water level and nutrient mix every 2–3 days.
- Clean reservoir and tubing biweekly.
- Inspect plants for pests or mold regularly.
- Wipe down lights and fans monthly to remove dust buildup.
- Test pH and EC of nutrient solution weekly.
- Review timer settings once per month.
Scaling and Flexibility
Start small, but plan for growth. A good design allows for expansion. You might begin with a single vertical unit and eventually add a second one or introduce automated features like timed pumps or remote monitoring.
Design your system in modules that can be repositioned or disconnected as needed. Portability is helpful if you need to rearrange your apartment or move entirely. Consider foldable or disassemblable structures that can be packed flat when not in use.
Use quick-disconnect joints or modular frames that allow parts to be swapped or updated without rebuilding the entire system. If you’re experimenting with plant types, having separate zones for herbs, greens, or fruiting crops can help you optimize light and nutrient schedules.
Here are a few ways to increase flexibility:
- Use stackable growing containers.
- Incorporate caster wheels for mobile shelves.
- Install multiple plug-in timers to test different light cycles.
- Maintain a backup pump and light in case of equipment failure.
- Design extra tubing ports for future irrigation expansion.
Safety Considerations
Water and electricity are central to hydroponic setups, so plan around safety. Use GFCI (ground fault circuit interrupter) outlets and keep wiring tidy and away from moisture. Attach LED lights securely and double-check weight-bearing elements if you’re mounting anything overhead.
Test your grow setup thoroughly before planting anything. Run water through the system, check for leaks, test timers, and ensure your lighting doesn’t overheat nearby surfaces. Use Velcro cable ties and waterproof electrical connectors where possible.
Consider using:
- A surge protector with built-in timer
- Cord organizers or wall clips to prevent trip hazards
- Battery backups or alarms for critical systems
- Anti-slip mats under containers
- Fire-safe extension cords rated for indoor growing
Even in small systems, safe design ensures longevity and peace of mind.
Making It a Long-Term Solution
Finally, design for sustainability. Use materials you can clean and reuse. Choose energy-efficient components. Incorporate features that reduce water use, like drip emitters or closed-loop recirculation.
Reuse old nutrient containers as backup reservoirs. Keep extra net pots, tubing, and grow media on hand to minimize downtime. Documenting your system layout and routine also helps you troubleshoot and improve efficiency over time.
Keep a simple digital or physical grow log. Note planting dates, growth milestones, and any system adjustments. This will improve your yields over time and help identify patterns in plant performance.
A well-designed apartment grow setup becomes a lifestyle feature rather than a chore. It should integrate smoothly with your routines, offer convenience, and—most importantly—support consistent, satisfying growth.
Final Thoughts
Designing an apartment-friendly indoor grow setup doesn’t require a huge budget or advanced technical knowledge. With smart use of vertical space, compact and quiet equipment, and thoughtful layout planning, you can build a productive garden that enhances your living space rather than crowding it. Focus on flexibility, cleanliness, and comfort, and your grow setup will be a source of pride and plenty for seasons to come.
Whether you’re growing basil for fresh pasta, lettuce for salads, or experimenting with strawberries on a vertical trellis, an apartment-friendly hydroponic system brings freshness, satisfaction, and sustainability right into your home.