Living in a small apartment makes it tough to grow your own food. There’s little space, no garden, and sunlight is hard to catch.
That’s where a soilless grow tent comes in. It lets you grow plants without dirt, mess, or changing the layout of your home.
In this guide, you’ll learn how to set up a soilless grow tent in your apartment—from picking a spot to getting it running.
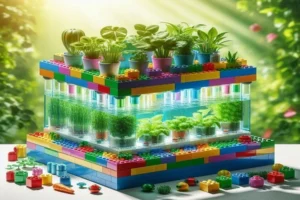
A grow tent gives you full control over light, airflow, and temperature. It’s a mini indoor farm built just for you.
This system uses hydroponics. That means plants grow in water, not soil, and they get everything they need from liquid nutrients.
It works well in vertical setups too. So you can grow more in less space—perfect for apartment living.
You’ll also learn what gear you need, how to put it together, and how to keep it running smoothly.
By the end, you’ll know how to grow your own greens indoors, no matter the time of year. Let’s get into it.
What Is a Soilless Grow Tent and Why Use One in an Apartment?
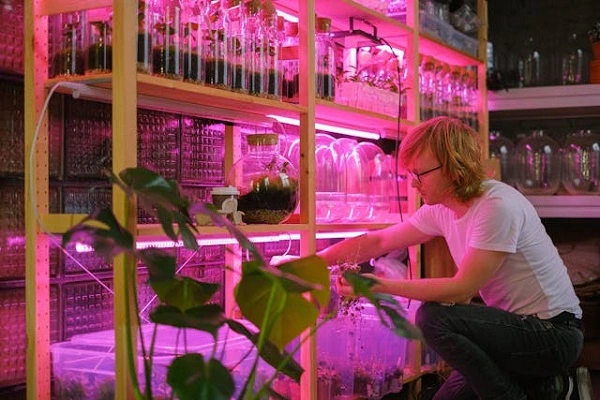
A grow tent is a compact, enclosed space made for growing plants indoors. Think of it as a mini farm in a zip-up fabric shell.
It keeps light in and keeps outside air out. That means better control over how your plants grow, day or night.
Now add a soilless setup—like hydroponics or aeroponics—and you’ve got a clean, efficient way to grow without dirt.
Plants get nutrients from water, not soil. Less mess, fewer bugs, and faster growth. All in a tight, controlled space.
If you’re wondering how to set up a soilless grow tent in your apartment, understanding what it is should be your first step.
Tents help manage smell with carbon filters. Fans keep the air moving. Everything stays tidy and discreet.
LED lights inside mimic the sun. Your plants stay happy even in a dark corner or a room with no windows.
Because you control the climate, there’s no need to wait for spring. You can harvest leafy greens or herbs any time.
It also saves space. Vertical systems fit right inside a tent, making it perfect for tight apartments or shared homes.
Urban renters love it. You don’t need a yard, and it won’t upset the neighbors or your landlord.
Bottom line? It’s a smart, compact way to grow food indoors—with no soil, no sun, and no stress.
Planning Your Space: Choosing the Right Spot and Tent Size
Before buying a grow tent, look around your apartment. Find a spot that’s quiet, out of the way, and won’t block your daily flow.
Corners work well. So do closets, laundry rooms, and spots near balcony doors. Just make sure there’s enough air movement.
Measure your space first. A tent that’s too big will crowd your living area. Start small—you can always scale up later.
Vertical hydroponic systems need more height than width. Check the ceiling clearance so plants and lights have room to grow.
You’ll also need a nearby power outlet. Lights, fans, and pumps all need electricity. Extension cords can get messy and unsafe.
Think about water access, too. You’ll need to fill and drain reservoirs. Closer to a sink makes life easier.
Most grow tents are lightweight, but water adds weight. Make sure your floor can handle it—especially in older buildings.
If you rent, avoid drilling or permanent fixtures. Choose a system you can break down and take with you if you move.
Good airflow is key. Pick a spot where heat and humidity won’t build up. Crack a window if needed.
If you’re tight on space, a 2×2 or 2×4-foot tent fits most apartments. It’s just enough room to grow vertically and stay efficient.
Planning right from the start will save you time, stress, and rework later.
Components Checklist: What You’ll Need for a Complete Soilless Tent System
Setting up a soilless grow tent takes a few key tools. Some are must-haves, others just make things easier. Let’s break it down.
- Grow Tent – This is your growing zone. Prices start around $80. Look for sturdy zippers and thick fabric for better light control.
- LED Grow Lights – LEDs mimic sunlight. Go for full-spectrum lights. A good one runs $60 to $150 depending on size and quality.
- Inline Fan & Carbon Filter – These control airflow and smells. A solid kit costs $70 to $120. Keep your space fresh and quiet.
- Nutrient Reservoir – This holds your nutrient mix. Basic totes start at $20. Add a lid to reduce light and algae.
- Water Pump – You’ll need one to move nutrients through your system. A small pump costs $15 to $30.
- Vertical Hydroponic Tower or NFT Pipes – These systems help you grow up, not out. Towers can run $80 to $200. DIY options are cheaper.
- Air Stones & Tubing – Oxygen keeps roots healthy. This setup helps aerate the water. Expect to spend around $15 to $25.
- Thermo-Hygrometer – Monitors temp and humidity. Small ones go for $10 to $20. Crucial for climate control.
- pH and EC Meters – Nutrient balance matters. Combo meters cost $30 to $70. Accuracy here saves plants.
- Timers & Smart Plugs – Automate your lights and pumps. Basic timers start at $10, smart plugs go for $20 to $40.
- Optional but Helpful – Reflective film boosts light. Humidity domes help seedlings. Automation tools save time. Add as your budget allows.
You don’t have to buy it all at once. Start simple, grow into it. A solid setup is possible for under $500.
Step-by-Step Assembly: From Frame to Function
Step 1: Set Up the Tent and Ventilation
- Unpack your tent and build the frame. Most models click together without tools.
- Slide the fabric cover over the frame. Zip it shut to check for light leaks.
- Install the inline fan and carbon filter near the top. This pulls warm air out.
- Use ducting to guide airflow and hang the fan securely with straps or clips.
- Make sure the intake area stays open or add a passive vent at the bottom.
Step 2: Install Lighting and Timers
- Hang your LED lights from the tent’s top bars. Use ratchet hangers to adjust height.
- Keep lights centered and evenly spaced over your grow area.
- Plug lights into a timer or smart plug. Set it for 14–16 hours on for leafy greens.
Step 3: Build the Hydroponic System Inside
- Set up your vertical tower or NFT pipes inside the tent. Place it near the back wall.
- Leave room for airflow and easy access to your plants.
- Use a waterproof mat underneath in case of spills.
Step 4: Add Water Reservoir and Tubing
- Place your reservoir outside or inside the tent, depending on space.
- Connect the water pump to your hydro system with tubing.
- Add air stones to the reservoir and hook them up to an air pump.
Step 5: Calibrate Your Sensors
- Insert the pH, EC, and temperature probes into the reservoir.
- Calibrate each sensor following the manufacturer’s instructions. Accuracy matters here.
Step 6: Run a System Test
- Turn everything on. Watch for leaks, blockages, or noise from pumps.
- Check light timers, fan operation, and water flow.
- Let it run for 15–30 minutes before adding plants.
Pro Tips:
- Use Velcro ties to manage cables and hoses.
- Keep airflow moving under and around your plants.
- Test everything before adding seedlings. It saves time and avoids stress.
Now your tent’s ready to grow. Clean, compact, and fully in your control.
Managing the Microclimate Inside Your Tent
Your tent is set up—now it’s time to create the right environment inside. Plants thrive when the microclimate stays consistent.
Temperature matters. Aim for 65–75°F during the day. A small drop at night is okay but avoid big swings.
Humidity should sit between 50–70%. Young plants like it higher, mature ones lower. Use a humidifier or dehumidifier if needed.
Keep airflow steady. Your inline fan should run often, and clip-on fans help move air around the leaves.
Without airflow, heat builds up fast. Mold can also creep in. Even a small fan makes a big difference.
Light cycles depend on what you grow. Leafy greens love 14–16 hours of light. Fruiting plants may need 18 hours.
Set timers to manage light and fan cycles. Smart plugs can make things even easier with app-based control.
Track conditions using a simple thermo-hygrometer. For more control, try Wi-Fi sensors that alert you if something’s off.
Noise and smell can be issues in small spaces. Use a carbon filter to trap odors. Go for quiet fans when you can.
Light leaks? Tape up zippers and seams. Light escaping is light wasted. It also messes with plant growth cycles.
Managing your tent’s climate isn’t hard—it just takes a little attention. Keep things stable and your plants will reward you.
Wrapping Up
Keeping your soilless grow tent running smoothly takes a bit of routine care. But once you’re in the groove, it’s easy to manage.
Change your water every 1–2 weeks. Rinse out the reservoir and clean the pump to avoid algae and build-up.
Check your pH and EC levels regularly. Balanced nutrients = happy plants. Off numbers? Adjust before issues show up.
Look out for mold—it thrives in still air and high humidity. Boost airflow and lower moisture to keep it in check.
Yellow leaves? Could be nutrient imbalance or root stress. Check pH, water temp, and inspect roots for rot.
If your pump stops working, unplug and clean it first. Mineral build-up is often the problem. Keep a spare if possible.
Avoid these common mistakes:
- Overcrowding limits airflow and light.
- Overfeeding can burn roots.
- Poor airflow leads to mold and slow growth.
Now for the fun part—choosing what to grow. Here’s what thrives in compact vertical hydro setups:
Leafy greens: Lettuce, spinach, arugula
- Light: 14–16 hrs/day
- Water: High flow
- Space: Tight spacing, vertical-friendly
Herbs: Basil, mint, cilantro
- Light: 12–14 hrs/day
- Water: Moderate
- Space: Small pods or pipes
Fruits: Strawberries, dwarf tomatoes
- Light: 16–18 hrs/day
- Water: Steady
- Space: More room needed for root support
With just a few tools and the right setup, you can grow delicious food indoors.
If you’ve been wondering how to set up a soilless grow tent in your apartment, now you’ve got the full system plan to make it happen.