You started with basil on the sill. A few mason jars, a cheap grow light, and dreams of pesto. Now? You’re eyeing cherry tomatoes.
Maybe even chilies, or a leafy green wall in your kitchen. But space is tight, and your needs keep shifting.
That tiny setup was great for starters. But what happens when you want more variety? Or when your lettuce-loving friend gifts you kale seeds?
One season it’s herbs, the next it’s strawberries. Your system should flex as your cravings do.
What if you didn’t have to rebuild everything to grow more?
That’s where modular DIY systems come in. Think expandable, customizable, and apartment-friendly.
In this post, we’ll show you how to build once — and adapt forever. Let’s make your grow setup work as hard as you do.
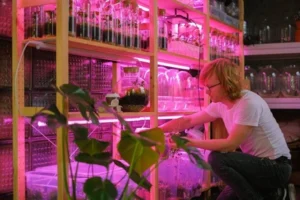
What “Modular” Really Means in Vertical Hydroponics
Modular means you build in parts. Each part works on its own—and with others. You can grow now and expand later.
In hydroponics, modular setups aren’t locked in. You’re not stuck with one shape or size forever.
Fixed systems? They’re like glued puzzles. Once it’s built, that’s it. No room to tweak or grow.
Modular systems are like LEGO. You stack pieces, shift them, swap them. Change the shape whenever you want.
Need more light? Clip on a bar. Want new crops? Swap the tower. It’s easy to adjust as your needs change.
Apartment layouts vary. Modular designs flex to fit any nook, shelf, or wall. No floor space? Go vertical.
Upgrading is simple. Add a better pump, a new timer, or switch to smart tech—without tearing it all down.
Different crops need different setups. With modular gear, you can switch things up when your menu changes.
Planning for Scalability from Day One
Think ahead. Don’t just build for now—build for what your future garden might look like.
Your setup should start small, but be ready to grow tall. Space up, not out.
Check your ceiling height. You’ll need room if you plan to stack more grow units later.
Balance matters. Don’t overload shelves or racks. Keep it sturdy, especially as you expand.
Plan for clean water flow. Future add-ons need good drainage and space for tubing.
Leave room to connect more parts. Think like a plumber with a green thumb.
Use containers you can link together. Daisy-chained reservoirs save time and fit small spaces.
Skip one-off pieces. Standard pipes and fittings make upgrades smoother and cheaper.
PVC, NFT rails, and modular shelves play nice together. Uniform parts = endless add-ons.
Key things to think about early:
- Vertical clearance: Make sure there’s room to build up.
- Weight distribution: Don’t overload shelves or brackets.
- Drainage and access: Plan for hoses, pumps, and expansion space.
- Reservoir setup: Use tanks that can connect as you scale up.
- Material choices: Stick with standardized sizes and fittings.
Core Modular Components You Can DIY
Let’s break it down. These are the core parts of a modular hydroponic setup. Each one’s DIY-friendly and built to scale with you.
Start small. One tower, one light, one tank. Then stack, snap, or slide in more as your garden grows.
Grow Towers
- Use food-safe PVC or ABS pipe.
- Drill holes for net cups.
- Stack vertically with T-connectors or brackets.
Lighting Modules
- Clip-on LED bars are easy to move.
- Use rail-based lights for multiple towers.
- Hinged lights tilt as your plants grow.
Reservoirs
- Stack bins or use side-mount options.
- Add valves for easy connections.
- Daisy-chain tanks when you expand.
Automation Units
- Plug-in timers control lights and pumps.
- Use Wi-Fi modules for remote control.
- Add more as you build out new zones.
Stick to universal parts. This keeps every upgrade simple and every new piece compatible.
Want examples? Check our other posts in the SYSTEMS category for tower guides and lighting hacks.
Need visuals? A simple sketch can help you map your layout. Use paper—or tape it out on the floor.
Real Apartment Layouts, Real Modular Solution
Let’s talk real spaces. Tiny apartments, odd corners, small sinks—we’ve got ideas for all of them.
Studio Corner Garden
You’ve got one empty corner and a sunny window. Start with one grow tower and a clip-on light.
Add a second tower later. Use a small shelf to hold your reservoir. All pieces snap in—no mess, no overhaul.
Balcony Wall Unit
Mount a rail system to an exterior wall. Hang slim towers and connect a bottom tank. It’s vertical and wind-friendly.
Need more crops? Extend the rail. Add one tower at a time. Use brackets that pop off when you need to adjust.
Above-the-Sink Mini Rack
Stack two tiers above your kitchen sink. It’s out of the way and close to water for refills.
Outgrow it? Place another rack beside it. Link the reservoirs underneath with tubing and a shared pump.
Each setup starts with the same base parts: towers, lights, a tank. Just arranged to fit your space.
Before building, sketch your layout. Use painter’s tape to mark dimensions. Make sure it flows with your routine.
Scaling Up Without Starting Over
You don’t need to tear it all down just to grow more. That’s the beauty of modular hydroponics—scaling up should be simple.
Your system should grow with you. New crops? More plants? Extra light? No problem. Let’s walk through how to upgrade without the headache.
Add Towers Without Rebuilding
Use T-connectors or threaded caps in your water lines. When you’re ready, pop in a new tower, connect it, and keep growing.
Already stacked a few? Add more with the same brackets or support frame. You won’t have to touch what’s already working.
Extend Lighting the Smart Way
Most modular LED bars come with link ports. Just clip a new light to the end of your rail or stack one above the other.
Use adjustable mounts so your lights grow with your plants. As your garden expands, your lighting simply follows.
Irrigation Upgrades Made Easy
Start with a single pump, then split the flow using T-joints or manifolds. Each new tower gets its own line—no new pump required.
If you’re using gravity-fed or drip systems, add new emitters or lines. Most connectors just click in place.
From Manual to Smart: Step-by-Step Automation
- Start with a basic timer for your lights and pumps.
- Upgrade to digital controllers with preset programs.
- Add Wi-Fi smart plugs to manage things from your phone.
- Eventually, install sensors to track pH, temp, or water levels.
No need to buy it all at once. Build in layers. Automate one thing at a time, and only when you’re ready.
Common Worries—Answered
- Will I have to rebuild everything?
Not at all. Modular means modular. Everything adds onto what you’ve already built.
- Will the parts still fit?
If you start with standard pipes, clips, and fittings—yes. Consistency is key to seamless upgrades.
- What if I move?
Break it down into chunks. Each module is designed to travel. Towers, tanks, and lights can be packed separately.
Rebuild in your next space, however you like. New layout? Same system.
With a little planning, your setup can double in size without doubling the work. Build smart now, scale later.
Maintenance and Flexibility: The Hidden Perks
Modular setups aren’t just easy to build—they also make maintenance and adjustments a lot easier. Flexibility is one of their best perks.
Cleaning becomes a breeze. You don’t have to tear everything down. Simply detach sections, give them a good scrub, and snap them back into place. Your other modules stay untouched, so you don’t disrupt the entire system.
When you’re rotating crops, swapping modules is quick. If one section has lettuce, and the next needs herbs, just pull out the module and switch it up. No need for a complete rebuild.
Got a pest problem in one section? No stress. You can isolate the affected area by detaching it. Treat it separately while your other plants stay safe and healthy.
Thinking of exploring new methods? Want to try aeroponics or a different technique? Simply add a new module designed for that. You don’t have to overhaul everything that’s already working for you.
The beauty of modular systems is that they adapt to your needs. Whether you’re cleaning, upgrading, or experimenting with new ideas, the process is simple and non-disruptive. You get to grow your garden the way you want—whenever you want.
Mistakes to Avoid When Building Modular Systems
When building a modular hydroponic system, it’s tempting to get creative with custom parts. But going too custom can cause problems. Mismatched pieces might not fit future upgrades or could limit your options down the road. Stick to standardized parts where possible to keep things flexible.
Another key mistake is ignoring access for maintenance. Think ahead—will you be able to adjust or repair your system once it’s in place? If you block lighting or pumps by stacking towers too tightly, it becomes difficult to reach them later. Always leave room for easy access.
Water flow is the heart of your system, so keep it simple. Overcomplicating the design with too many valves, connectors, or unnecessary twists can lead to leaks, clogs, or uneven distribution. Use the fewest parts necessary to get the water flowing smoothly.
If you’re building tall towers or a vertical system, make sure everything is anchored securely. Tall systems are prone to tipping, especially if your building experiences vibrations or even minor earthquakes. Reinforce with sturdy brackets, anchor points, or wall mounts to avoid accidents.
By planning smart from the start, you’ll avoid costly mistakes and make future upgrades easier. Keep things simple, flexible, and accessible. That way, your system will grow with you, without unnecessary setbacks.
Wrap-Up: Build Once, Grow Forever
The beauty of modular hydroponics lies in its flexibility: build once, and adapt as your needs change. Whether you’re starting small or planning to grow big, your system can evolve with you. That’s the ultimate freedom, especially when working with limited space.
In an apartment or small home, every inch counts. But with modular systems, you’re not locked into one design or layout. You can experiment, switch things up, and scale without having to rebuild. It’s about giving yourself the freedom to adapt as your plants (and needs) grow.
So don’t be afraid to get creative. Try mixing and matching parts, explore new crops, or even dive into different hydroponic techniques. Your system should work for you—whether you’re growing herbs on your kitchen counter or a vertical garden in your living room.